What is the .htaccess file for
The text file allows the author of web pages to set the selected server properties. Additionally, it does not need full administrator access and it only affects server behaviour for the selected directory and subdirectory on the server. WordPress basically uses it to set the behaviour of generated URLs to make them search engine friendly.
Where do I find the .htaccess file
The file is located in the root folder of your web hosting. Just log in to FTP with the help of the selected client and you should see the file.
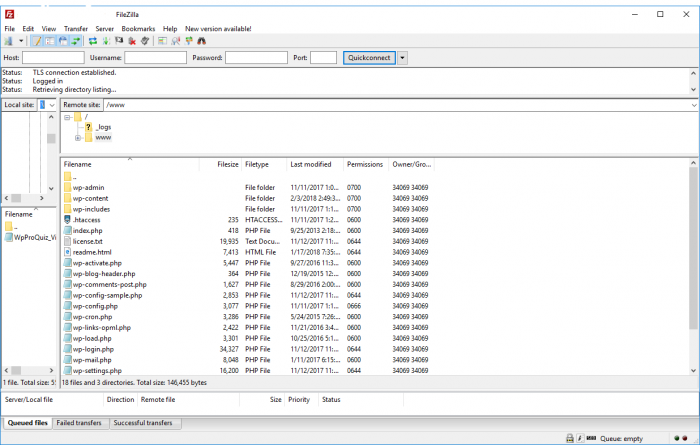
Sometimes, you can not see the file after logging in to an FTP client. In this case, it is sufficient to force the display of hidden files in the program settings (most commonly Total Commander, WinSCP or FileZilla).
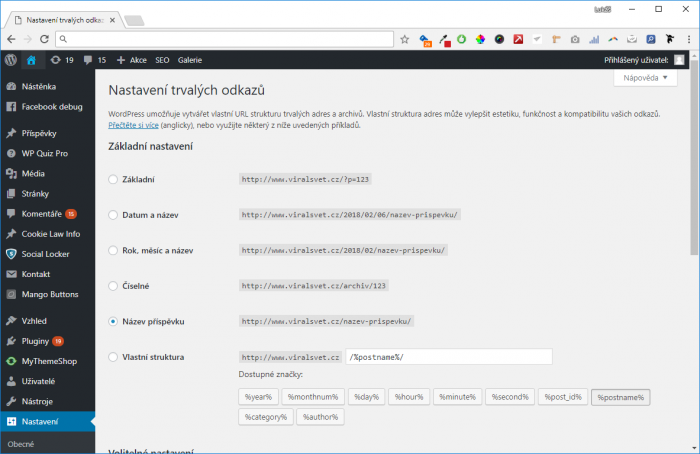
If you still cannot see the file, you can manually upload it to the server, or simply click on "Settings"> "Permanent links" in the WordPress settings to change the settings to other than basic and save. Now you should already see the file on the server. Then, you can switch back the settings.
How to edit .htaccess
To edit a file, you can use any text editor, from Notepad to developer PSPad Editor. Before editing the file, make a backup of the file to your PC to be able to reset settings in case of problems.
1. Lock the administration to prevent uninvited guests
You can use the .htaccess file to manage your website by IP address. You will be able to connect to the website administration only from specific IP addresses and locations. This method is useful when you regularly connect to a PC or a few PCs with a static IP address. You can use the following code and copy it to the .htaccess file:
AuthUserFile /dev/null
AuthGroupFile /dev/null
AuthName "WordPress Admin Access Control"
AuthType Basic
<LIMIT GET>
order deny,allow
deny from all
# Enabled IP address 1:
allow from xx.xx.xx.xxx
# Enabled IP address 2:
allow from xx.xx.xx.xxx
</LIMIT>
Remember to replace the allowed IP address with your own. There can be as many allowed addresses as you want.
2. Protect the administration with another password
If you connect to WordPress from different locations and do not want to be limited by a specific IP address, you can use password security. First, generate a .htpasswds file using an online generator and then upload it to a folder that is not publicly accessible. Ideally in style:
/home/user/.htpasswds/public_html/wp-admin/passwd/
Now you can access the .htaccess file itself, to which you copy the following lines of code:
AuthName "Admins Only"
AuthUserFile /home/yourdirectory/.htpasswds/public_html/wp-admin/passwd
AuthGroupFile /dev/null
AuthType basic
require user putyourusernamehere
<Files admin-ajax.php>
Order allow,deny
Allow from all
Satisfy any
</Files>
Be sure to replace the path to the file as "AuthUserFile" for the path that corresponds to your web hosting structure.
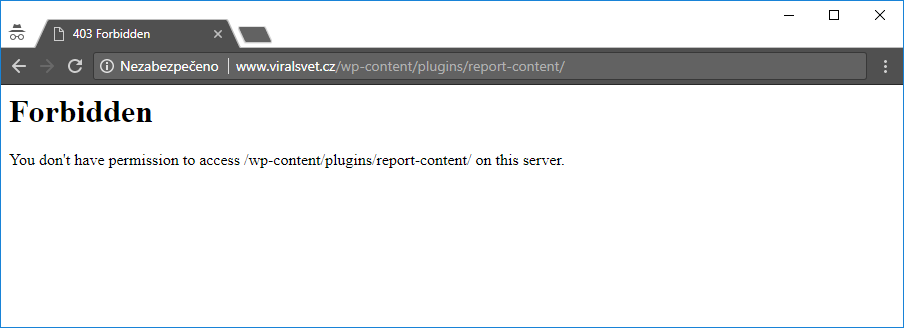
3. Disable browsing folders
To prevent attackers from seeing what files are on your web hosting, you can disable the public display of folders. This step is recommended by most security experts.
To activate, just add a single line to the .htaccess file:
Options -Indexes
4. Disable running PHP files in selected WordPress folders
Frequently, attackers attempt to break into the content management system using a so-called backdoor (backgates). Often, this is a file that will allow the attacker to sneak onto your web hosting so they can then execute additional commands and control your website.
One of the preventive solutions is to insert the following code into a new .htaccess file:
<Files *.php>
deny from all
</Files>
Then upload the file to each of the following folders:
- /wp-content/uploads/
- /wp-includes/
5. Secure the wp-config.php configuration file
One of the most important files on your WordPress site is wp-config.php. It includes access to the database, including passwords.
To secure the wp.config.php file, paste the following code into the .htaccess main file:
<files wp-config.php>
order allow,deny
deny from all
</files>
6. Disable access to specific IP addresses
Have you noticed an unusually high number of requests for your website from specific IP addresses? If you think this behaviour is suspicious, you can block access to your website for specific IP addresses.
Add the following lines to the .htaccess file and replace xxx with that IP address:
<Limit GET POST>
order allow,deny
deny from xxx.xxx.xx.x
allow from all
</Limit>
7. Disable scanners in WordPress
Attacker's favourite technique is a so-called brute force attack. Scanning will begin with the attackers detecting the authors' sign-in names to the website. After that, they just need to do a dictionary or brute force attack on their passwords to gain access to your WordPress administration.
The easiest way to do this is to block scanning of authors through the .htaccess file:
# BEGIN block author scans
RewriteEngine On
RewriteBase /
RewriteCond %{QUERY_STRING} (author=\d+) [NC]
RewriteRule .* - [F]
# END block author scans
8. Disable external application access to WordPress
Each WordPress installation hides the xmlrpc.php file. The file allows third-party services to access WordPress. If you do not use any of these services, security experts recommend that you block access to this file.
There are more ways to do so, but you can do it again by inserting the following line of code into .htaccess:
# Block WordPress xmlrpc.php requests
<Files xmlrpc.php>
order deny,allow
deny from all
</Files>
Our hint at the end: Secure the .htaccess file itself from unauthorized access
As you can see above, .htaccess can affect many users. That's why it's good to secure this file from attackers. Use the following lines of code to do so:
<files ~ "^.*\.([Hh][Tt][Aa])">
order allow,deny
deny from all
satisfy all
</files>